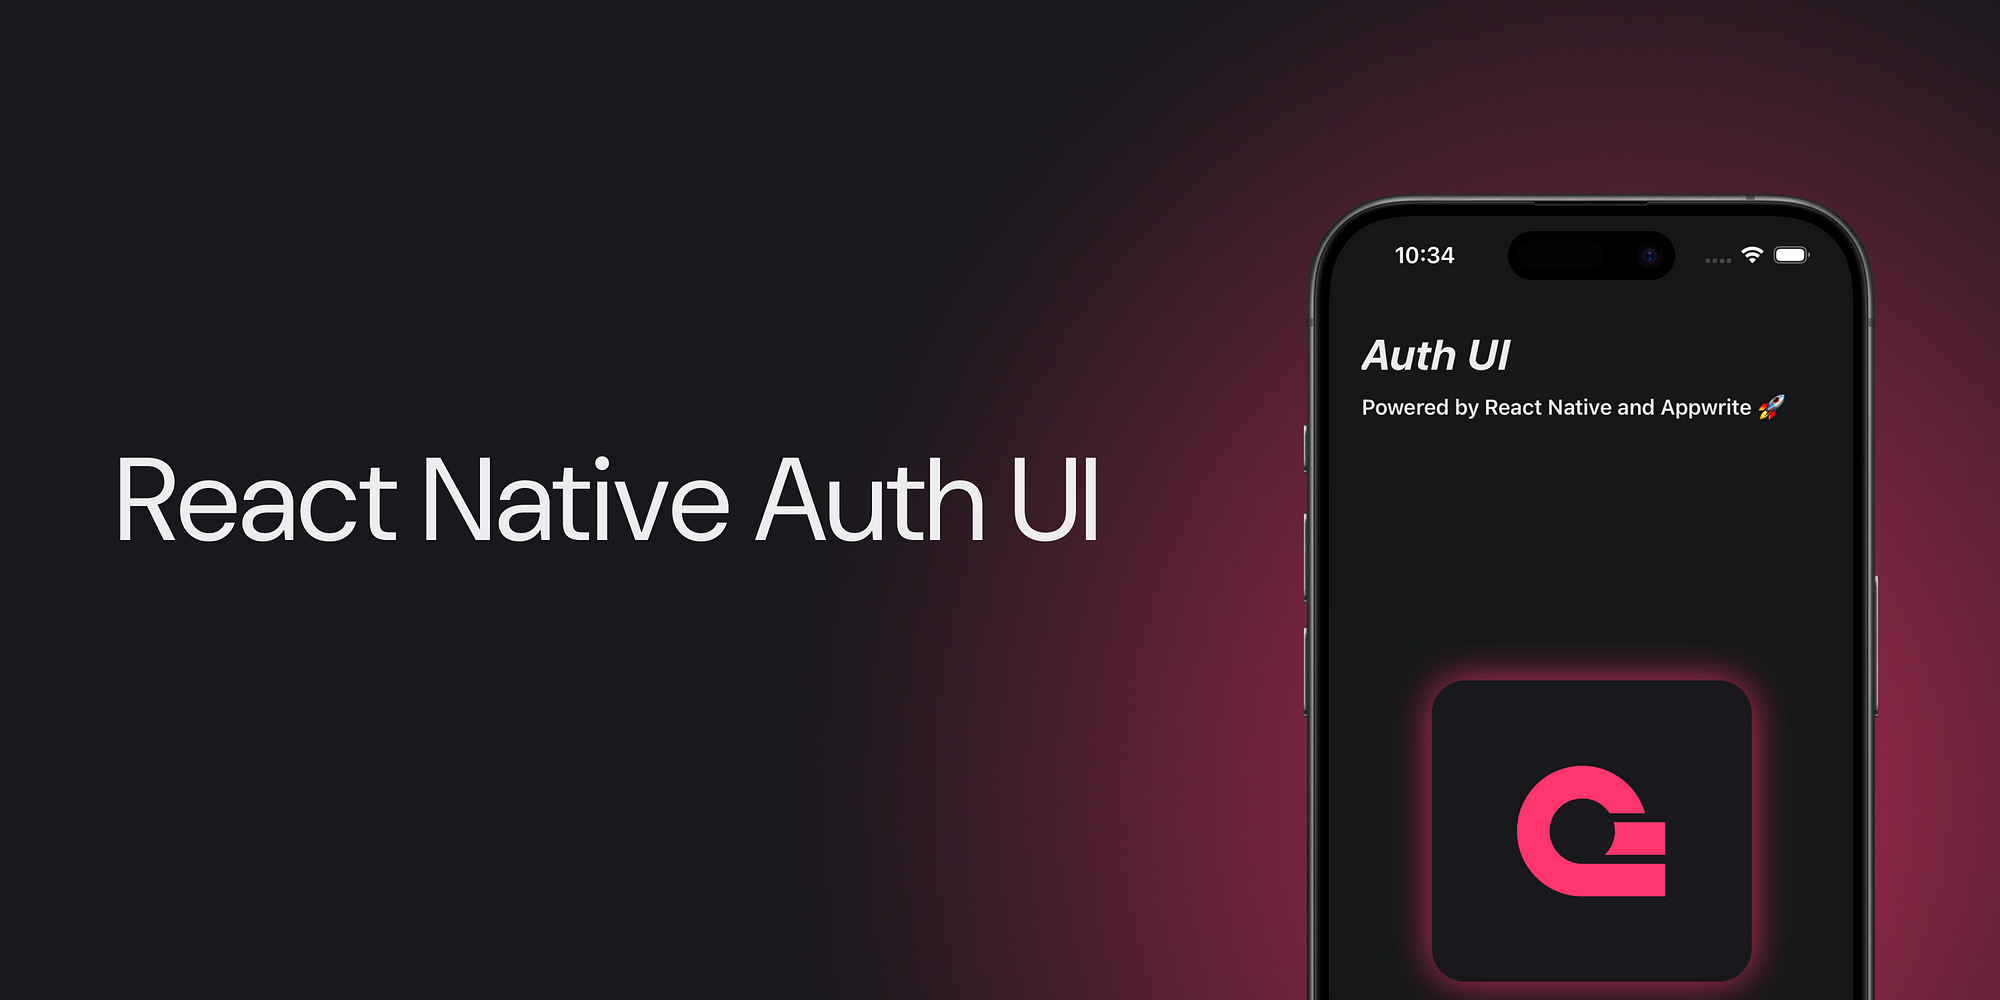
I built an Auth Template powered by React Native and Appwrite
Ever since appwrite released its React Native SDK, I was a bit curious to try it out to see how easy it is to integrate appwrite into a react native app.
Well, a few weeks ago, I launched an Auth Template for developers by a friendly neighbourhood developer 😉. In short, it's a readymade auth template that can be used in your next project.
In this blog, I am not gonna talk about how I built it but I will be talking about the challenges I faced while integrating appwrite and how I tackled them 😉
OAuth2
Given the current beta state of the Appwrite React Native SDK, implementing OAuth2 isn’t as straightforward as it is for Flutter. You need to handle the deeplinking manually passing the success and failed URL to the method.
Also
createOAuth2Sessionwon’t work as the cookies aren’t shared between the app and InApp browser when redirected.
Fret not 😉, Appwrite provides a method createOAuth2Token which appends userId and secret back to the success URL. We use this value to create a session manually
Let’s look at the code snippet in AuthContext.tsx
const loginWithOAuth = async (provider: OAuthProvider) => {
    // REFER: https://discord.com/channels/564160730845151244/1241035472017424404
    // https://github.com/appwrite/sdk-for-react-native/issues/10#issuecomment-2182781560
    // createOAuth2Session would not work as the cookies aren't being returned to the client.
    let redirectScheme = makeRedirectUri({ preferLocalhost: true });

    //HACK: localhost is a hack to get the redirection possible
    if (!redirectScheme.includes('localhost')) {
      redirectScheme = `${redirectScheme}localhost`;
    }

    const url = account.createOAuth2Token(provider, redirectScheme);
    // It should never return void but the types say so that needs a fix on the SDK
    if (!url) return;

    const result = await openAuthSessionAsync(url.href, redirectScheme);
    if ('url' in result) {
      const resultUrl = new URL(result.url);
      const secret = resultUrl.searchParams.get('secret');
      const userId = resultUrl.searchParams.get('userId');
      if (!secret || !userId) return;
      await account.createSession(userId, secret);
    }

    setAuthState('pending');
  };
Let’s try to break this method into simpler terms
makeRedirectUri: It’s a method provided byexpo-auth-sessionpackage that returns a redirect scheme back to you. Make sure that the link containslocalhostinside it for now (unless you have a custom domain setup in Appwrite Cloud and added it as a platform).
An example of the URL could be
-rnauth://localhost
-exp://localhost:8081— You may find this scheme when using Expo GocreateOAuth2Token: It takes the provider name (Google, Facebook, Github) and the success URL which is our redirectScheme. This returns a URL that we would use to spawn an in-app browser.openAuthSessionSync: This method is provided byexpo-web-browserwhich helps in spawning in-app browser. This method opens up an auth session and once the auth session is complete it waits for redirection. If the redirection scheme matches, it redirects successfully.
The result you get is somewhat like this:
{
  "error": null,
  "type": "success",
  "url": "rnauth://localhost/?secret=aa91d53e48439e34938799d13665df3c81259dbcb2ca87743a1a977c4a89e427&userId=66bdf9e614d31e8c18b3#"
}
Notice the URL. It has a secret and an userId appended to the URL.
That’s it. Call createSession method and pass the required parameters to authenticate the users.
Now simply calling account.get() should return the current authenticated users. Here’s the logic of handling the auth state.
// AuthContext.tsx
const [authState, setAuthState] = useState<AuthState>('pending');

  // Will always run if the state is pending
  useEffect(() => {
    if (authState === 'pending') {
      (async () => {
        const user = await account.get().catch(e => {
          // console.warn(e);
          return null;
        });
        if (user) {
          setAuthState('authenticated');
        } else {
          setAuthState('unauthenticated');
        }
      })();
    }
  }, [authState]);
And that’s how we solved the OAuth2 problem 😉. This flow should work with all the OAuth providers that Appwrite supports.
Reset Password
This is one interesting problem that is not limited to React Native but to all mobile dev platforms.
Let’s talk about how a forgot password works with the help of a sequence diagram.
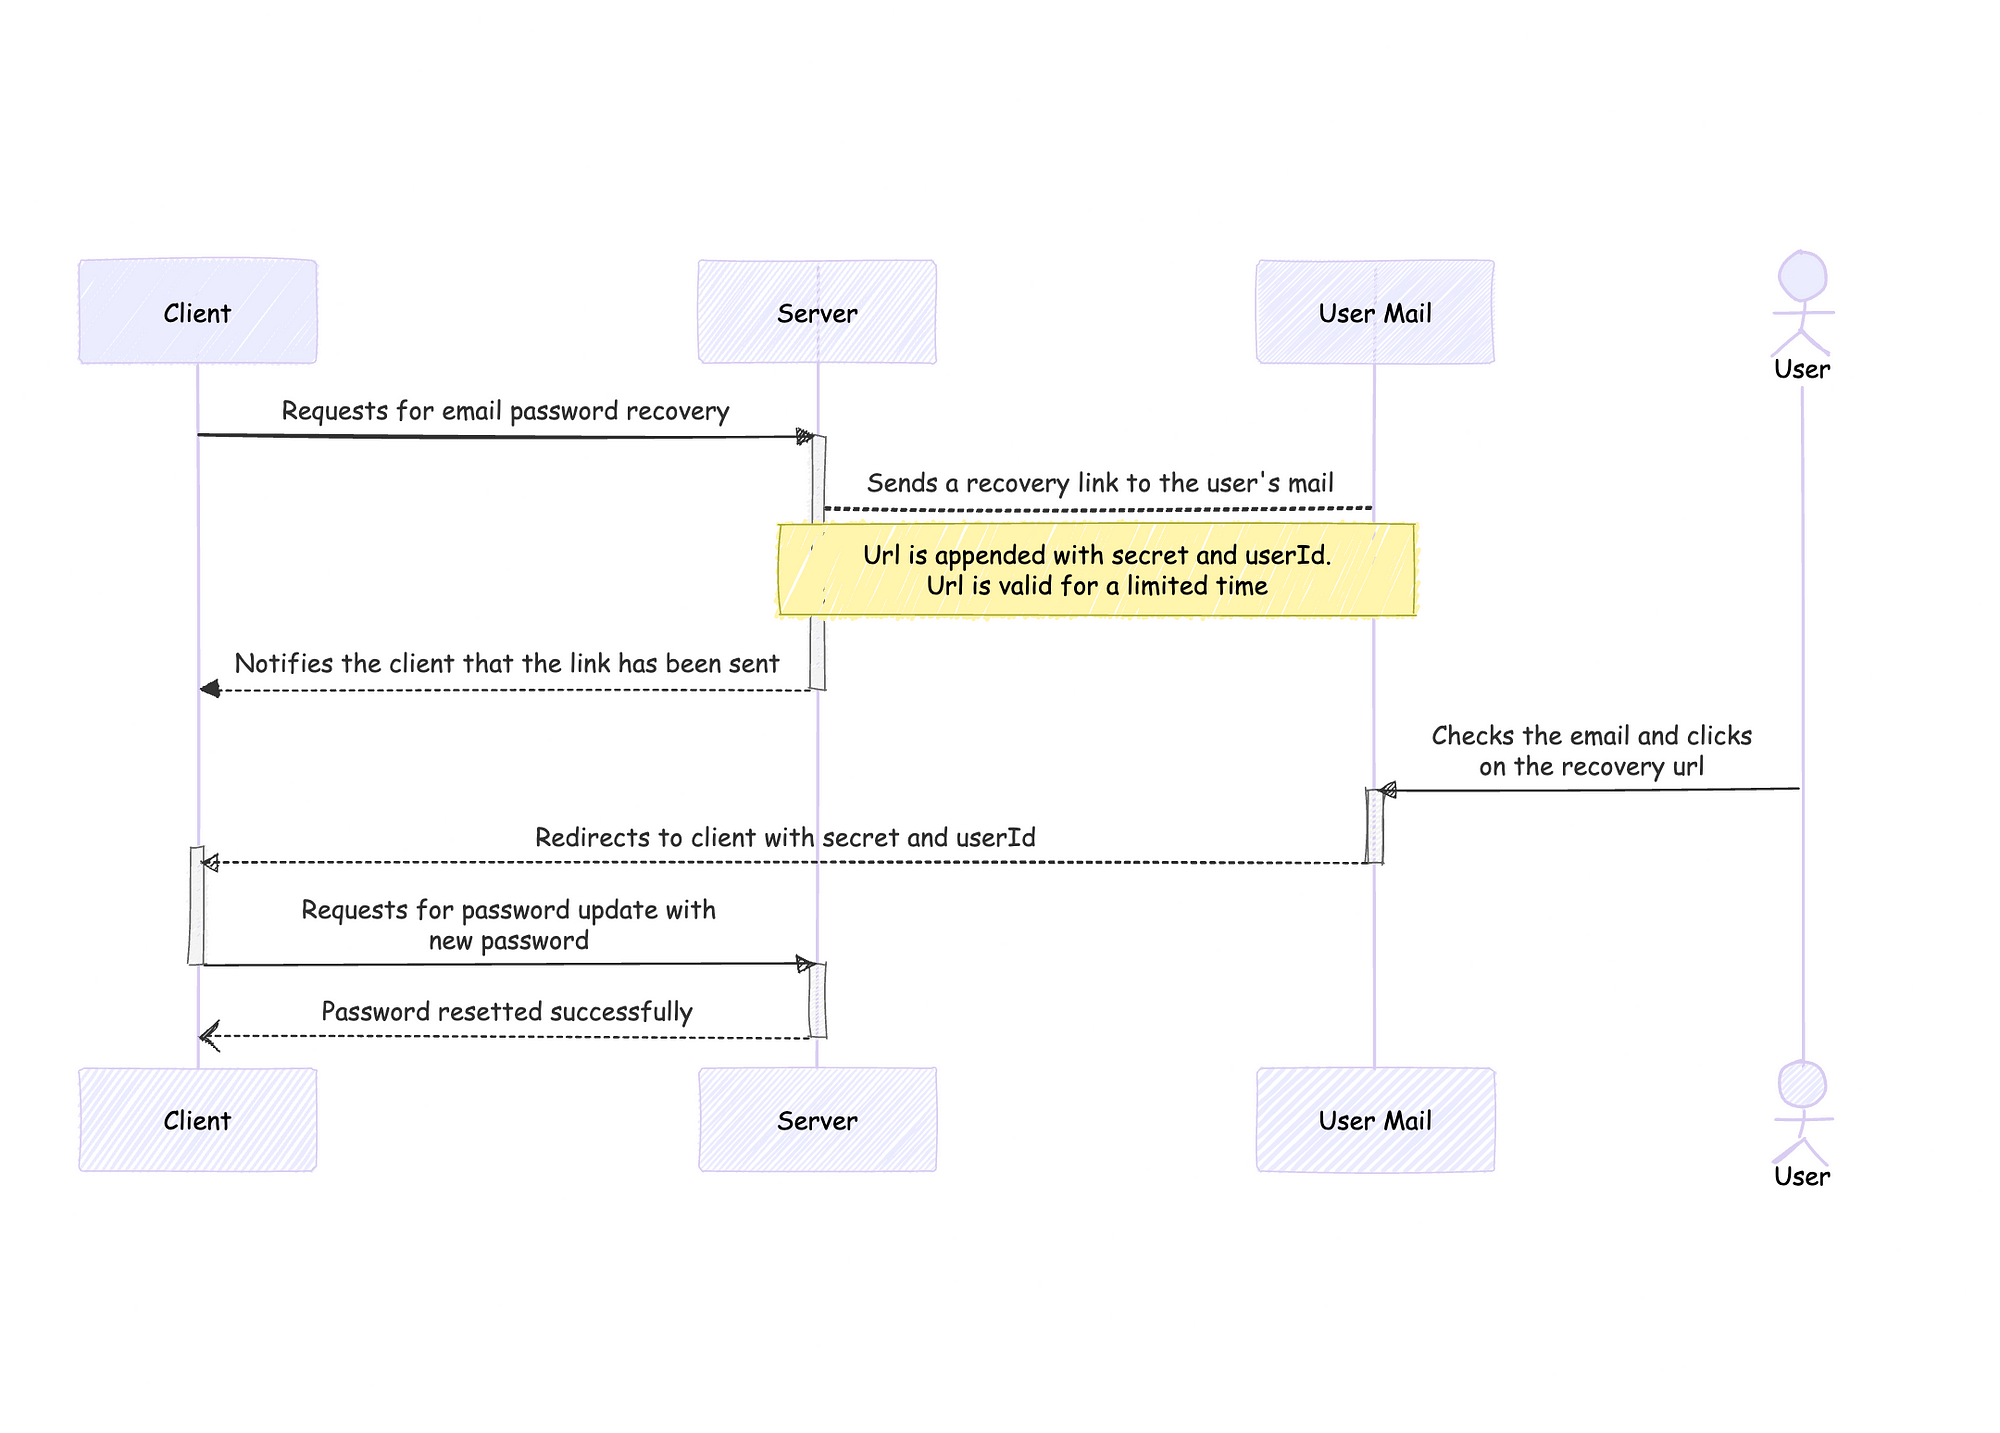
This seems to be a simple flow but there is one thing that can bug you during developing this and that is Redirecting back to your app.
If you look at the createRecovery method, it asks for an email and a url.
The URL redirects the user back to your app from the recovery email. Only URLs from hostnames in your project platform list are allowed. This requirement helps to prevent an open redirect attack against your project API.
Now if you simply send a redirect URL something like this below, it wouldn’t work as it won’t turn into a hyperlink and that adds some pain in the user experience on copying it to a browser (and that too can fail)
exp://localhost:8081/--/recover-password?userId=66bdf9e614d31e8c18b3&secret=95b99987f8caca0affc1381132814f4ee28e5b5c081bb287264fb69a033578270c808223ae18835ba65808dc3e2f07bd63090573f8c036b317993b43f47f65ea77a63ad7c94998ca84b7cc2398aabc9b2b862c3b4017ddf3f583d04efc2ddb8b2e3537a79a11852fccf2c9ff2e2e61e96b1387d006162732ece6829a0b8304af&expire=2024-08-16+09%3A24%3A29.590One solution could be to create a deeplinking to your app. That should work but I was a bit lazy to set up a bunch of whole things just to make this work.
Another solution might be to create a simple webpage that handles the password reset. You simply pass the website url to the method and that should do the work for you. But again, That is not a good user experience. I want the recovery to happen completely on the app side.
The Mentos Approach 🚀
I wrote a cloud function that acts as a redirector back to your app. Ofc, I need to take care of the security and handle unauthorized app scheme redirects. I also took care of bad or missing data as well. Once all data is validated, the cloud function redirects back to your app with the value.
The code is written in Dart. Why? Because I can 😉
import 'dart:async';
import 'dart:io';

extension ListExtension on List<String> {
  bool matchesScheme(String scheme) {
    if (this.isEmpty) return false;
    for (final item in this) {
      if (scheme.contains(item)) {
        return true;
      }
    }
    return false;
  }
}

/// Redirector Function
/// Redirects you to your Native App
/// Used for resetting password, verifying email, etc.
Future<dynamic> main(final context) async {
  final scheme = Platform.environment['APP_SCHEME'];

  final validSchemes = ['localhost', '192.168.1.2']; // localhost schemes
  if (scheme != null) {
    validSchemes.add(scheme);
  }

  if (context.req.method == 'GET') {
    final path = context.req.path as String;
    context.log('Path: $path');
    if (path.contains('/reset-password')) {
      final queryParams = context.req.query as Map<String, dynamic>;
      if (queryParams.isEmpty) {
        return context.res.send('No Query Params', 400, {
          'content-type': 'text/plain',
        });
      }

      final scheme = queryParams['scheme'] as String?;
      final secret = queryParams['secret'] as String?;
      final userId = queryParams['userId'] as String?;
      final expire = queryParams['expire'] as String?;
      if (scheme == null || secret == null || userId == null || expire == null) {
        context.log('Missing Query Params: {scheme: $scheme, secret: $secret, userId: $userId, expire: $expire}');
        return context.res.send('Missing Query Params', 400, {
          'content-type': 'text/plain',
        });
      }
      final decodedScheme = Uri.decodeComponent(scheme);

      if (!validSchemes.matchesScheme(decodedScheme)) {
        context.log('Invalid Scheme. $decodedScheme');
        return context.res.send('Invalid Scheme. If its correct, please add in your env in your cloud function', 400, {
          'content-type': 'text/plain',
        });
      }

      return context.res.redirect('${decodedScheme}reset-password?secret=$secret&userId=$userId&expires=$expire', 301);
    }

    // Add more redirection code here. E.g for verifying email, etc.

    if (path.startsWith('/') || path.isEmpty)
      return context.res.send('Nothing to redirect to ;)', 204, {
        'content-type': 'text/plain',
      });
  } else {
    /// Only Get Requests are allowed
    final method = context.req.method as String;
    context.res.error('Method Not Allowed $method', 405);
    return context.res.send('$method Method Not Allowed', 405, {
      'content-type': 'text/plain',
    });
  }
}
And yes, this function can be used to handle any redirects needed back to the app. For instance, this same code can be used for verifying email as well.
The best part about this cloud function is that it’s compatible with every mobile development. You can use the same cloud function when building using Flutter and Native (Android and IOS) apps and not limited to React Native.
Ensure that you have added the correct app scheme in the function environment variables as well.
For e.grnauth
Once your cloud function is live, ensure that the host is added as a web app in your appwrite project. If you are using a custom domain, make sure that both the hosts of the function and project remain the same.
In my case, I didn’t set a custom domain and I simply used appwrite.global here and I added this as a web platform
And that’s it, we need to call the createRecovery method and pass in the updated URL.
const recoverPassword = useCallback(async (email: string) => {
    // returns a redirect scheme of the app
    const redirectScheme = makeRedirectUri();
    const redirectUrl = `${REDIRECT_URL}/reset-password?scheme=${redirectScheme}`;
    await account.createRecovery(email, redirectUrl);
  }, []);
Here, REDIRECT_URL is the cloud function base URL. For me it was simply this. https://66bf9c6f6356d124cc3.appwrite.global/
Once you invoke this code, you will get something like this in your email.

On clicking this, this should redirect back to your app on the Reset Password screen. If it fails, check the logs in the cloud function and add more logs if something’s not clear.
const confirmRecovery = async (userId: string, secret: string, password: string) => {
    await account.updateRecovery(userId, secret, password);
  };
Simply enter your new password and invoke this method passing the appropriate parameters. That should update your password and redirect you to the login page.
That’s all for this blog. Hope you learned something✨
Just gonna leave the repository link below for you to check out.