Can we build a Cross-Platform game using Flutter and Flame?

With the announcement of Flutter 2.8, the Flame engine also rolled out a stable 1.0.0 version.
But wait a minute !!!
What is Flame?
Flame is a modular Flutter game engine that provides a complete set of out-of-the-way solutions for games. It takes advantage of the powerful infrastructure provided by Flutter but simplifies the code you need to build your projects.
It provides you with a simple yet effective game loop implementation, and the necessary functionalities that you might need in a game. For instance; input, images, sprites, sprite sheets, animations, collision detection and a component system that we call Flame Component System (FCS for short).

So, if creating games in Flutter is possible, why not create one? The idea here is to make a game that works on all the major platforms and provides the same gaming experience.
Let’s Talk about how Flame works
In Flutter, everything is a widget, similarly, in Flame engine, everything is a component. The below image shows the basic lifecycle of how the game engine runs.

Let’s learn more about it while we build a game.
So, what are gonna build?
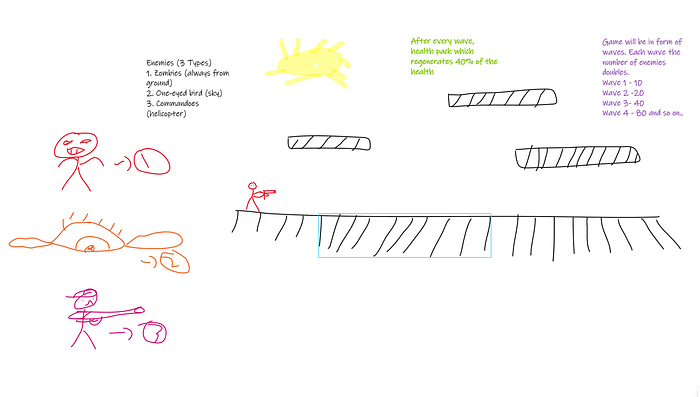
I was thinking of making an arcade/action-type game. The idea is we have a player with a weapon, we have a 2D map — ground, some floating grounds, and kinds of stuff. There would be enemies( currently 3 types) — waves of enemies and the goal is to eliminate all of them. The number of enemies would increase with each wave passing and it will go on until his health runs out. Thus we will then calculate his score. Since I was thinking of a cross-platform game, we would be having a high score board too. This was some sort of rough diagram I made 😂.
Let’s set up our project
You know what, I prepared some initial setup for you in a repo. Just clone it and we will be on the same page.
Before moving on, let’s check out the dependencies in the project which we are gonna use in this project and I will keep adding them when needed (as this isn’t gonna be a single blog😉).
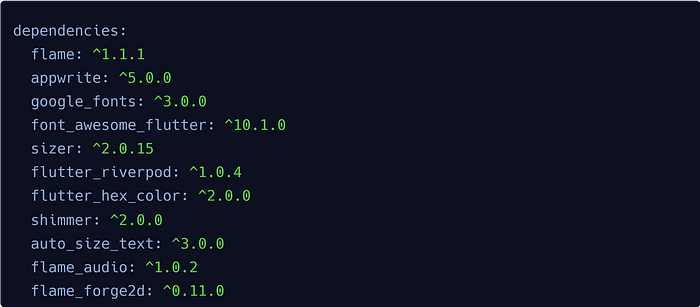
As you can see I added the flame dependency. That’s important to develop games in Flutter.
I have also imported flame_forge2d and flame_audio package. We will discuss more about this later.
For some light state management, I use riverpod , it’s my all-time favorite state-management solution.
And for Backend solutions, I used appwrite — an open-source firebase alternative. It’s rising its popularity these days and I love its simplicity on how easily you can use it. To know more about appwrite:
I won’t go deeper in appwrite (I have already made a series in it, refer from here), as this would be more oriented on game development, though I would talk some things about it which when required.
Now, this branch contains all the setup — the assets we are gonna use, an initial overlay (main menu), some utility classes, and the dependencies added.
NOTE: The assets used are all taken from itch.io . And these are assets are completely free to use for commercial purposes too.
Now if you open the project, there are some TODOs that we need to complete initially. But before that, I hope you have set up appwrite and integrated into your Flutter project (refer to this site for setup).
Now Let’s Complete those TODOs
I will start first with client.dart file.
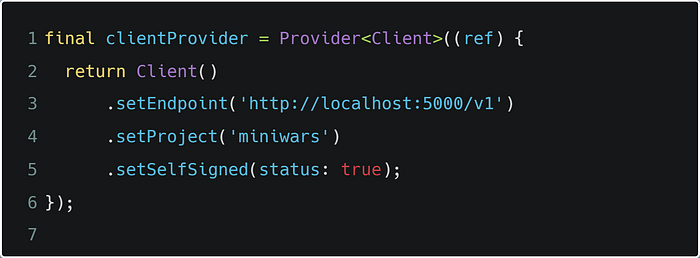
For me these are those settings, your endpoint could be different here if you set the default port. Your project Id could also be different here. Just make sure you double-check them in the appwrite Dashboard.
Now Let’s Look at the Authentication.dart file. There are 3 functions we need to complete.
- getAccount()
- login()
- loginAnonymous()
- logout()
Before moving forward, lemme tell you something. We would be using an OAuth2 for authentication. I was thinking since we are making a game, why not add a Discord OAuth here. Now the great part here is that Appwrite supports more than 20 OAuth providers and Discord is one of them.
Let’s Learn how to add setup Discord OAuth provider
STEP 1: Go to discord/developers/applications . Login if asked.
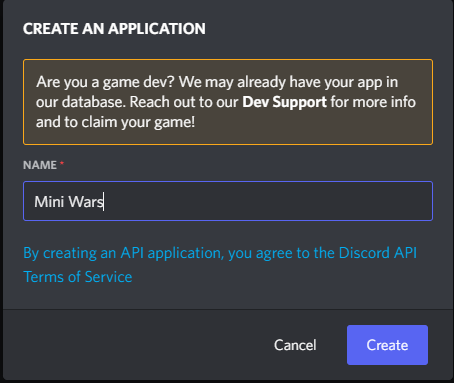
STEP 2: Click on New Application
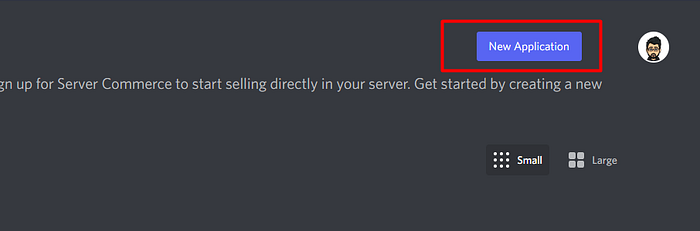
STEP 3: Give a name to your app . For me it’s Mini Wars. For you it could be anything or same. Click Create.
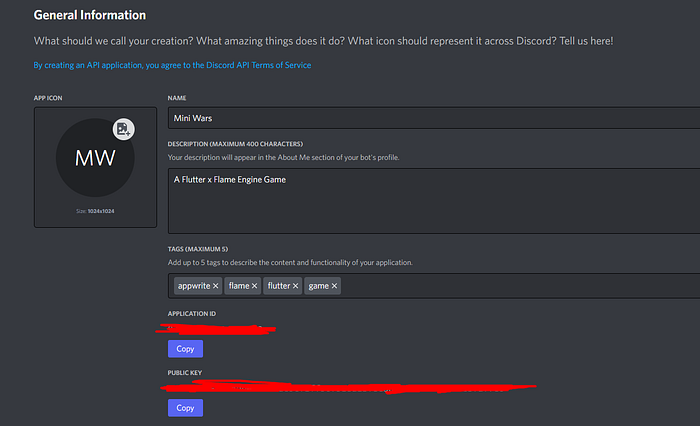
You would see something like this. It’s your wish if you want to add a description and tags.
What we want here is an APPLICATION ID and PUBLIC KEY.
STEP 4: Head over to Appwrite Dashboard -> Users -> Settings

Look for Discord OAuth under OAuth2 Providers
STEP 5: Enter the following fields and copy the redirect URL
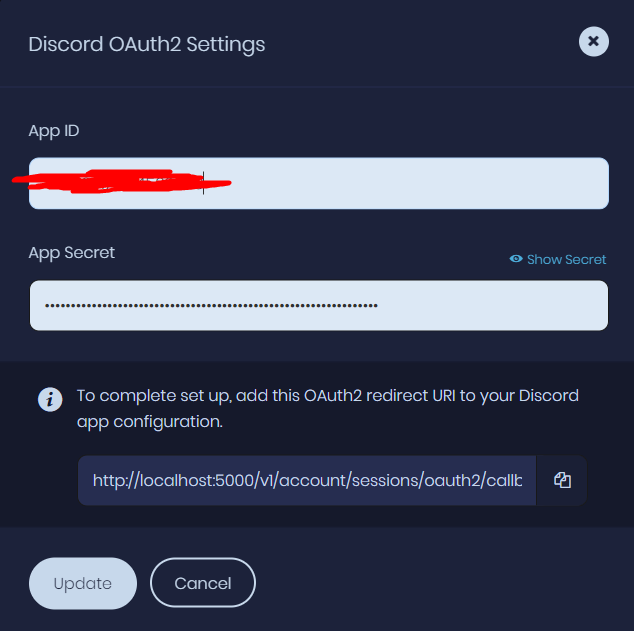
STEP 6: Now in the Discord Developer Portal — go to OAuth2 -> general and add the redirect URL there

That’s it, all the things have been done from the server-side. Let’s code now
REMINDER: Keep yourself Hydrated
Let’s Code Authentication class file
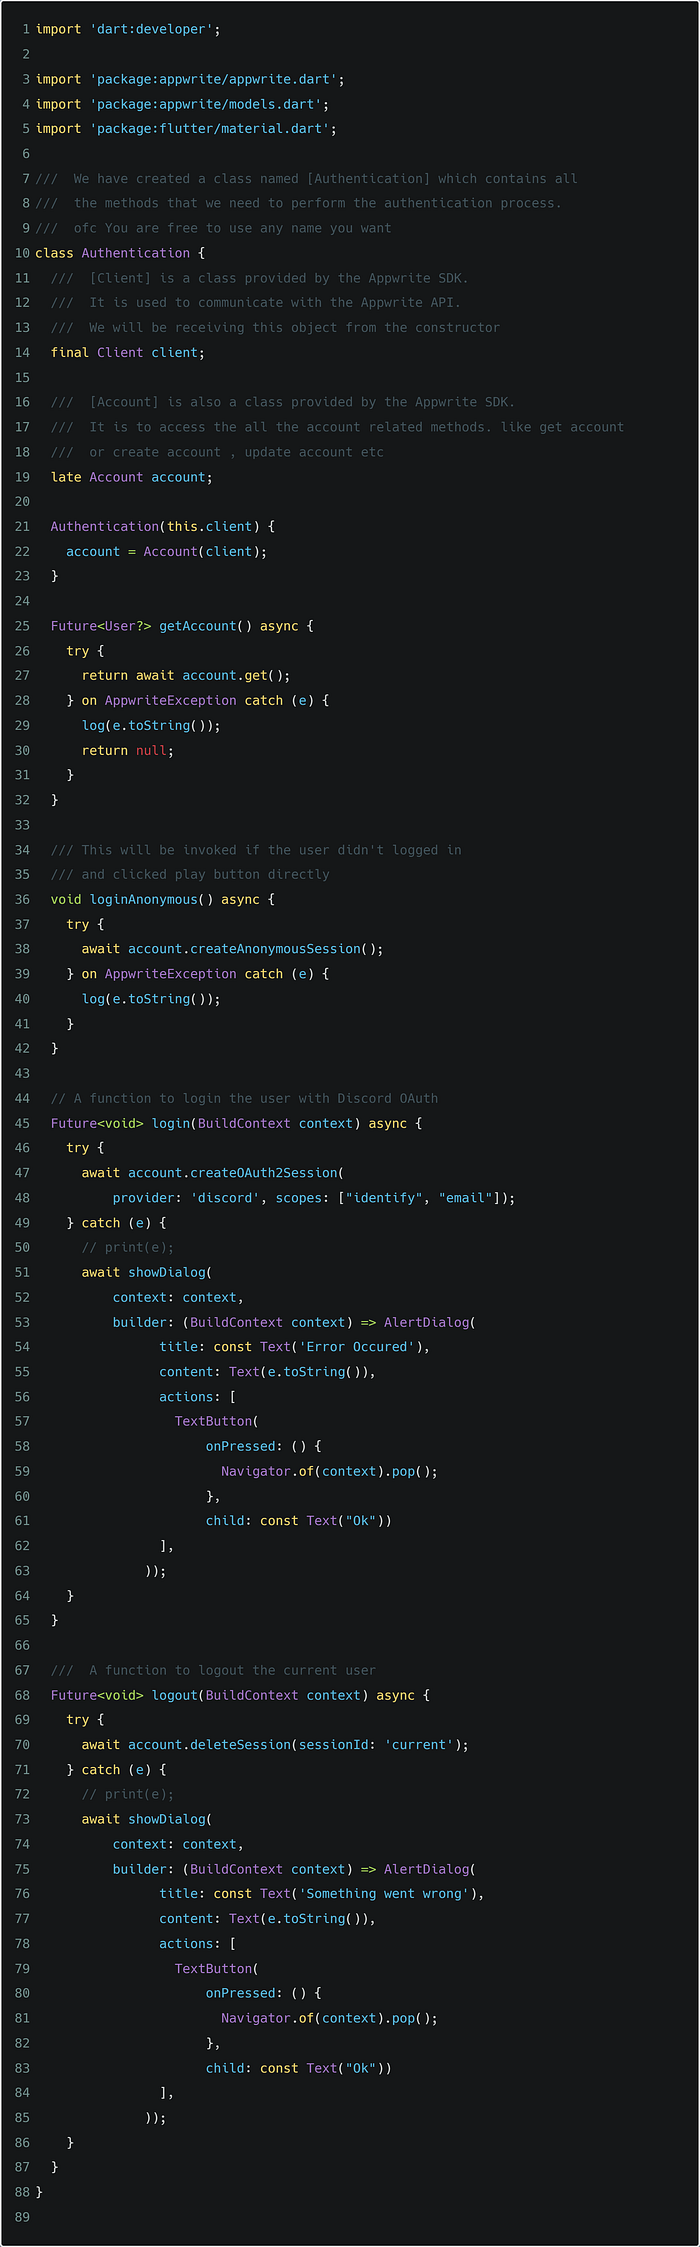
That implements all the utility functions needed for Authentication. One thing to note is that OAuth does not work in the Windows Flutter app. This is because the appwrite uses flutter_web_auth package to authenticate users.
Since this does not support Windows and Linux platforms yet, authentication is not yet possible. You can track this issue here. But it works well on other platforms (Web, iOS, Android, macOS)
Let’s complete the final function on the main_menu screen and let’s finally move on to the game logic.
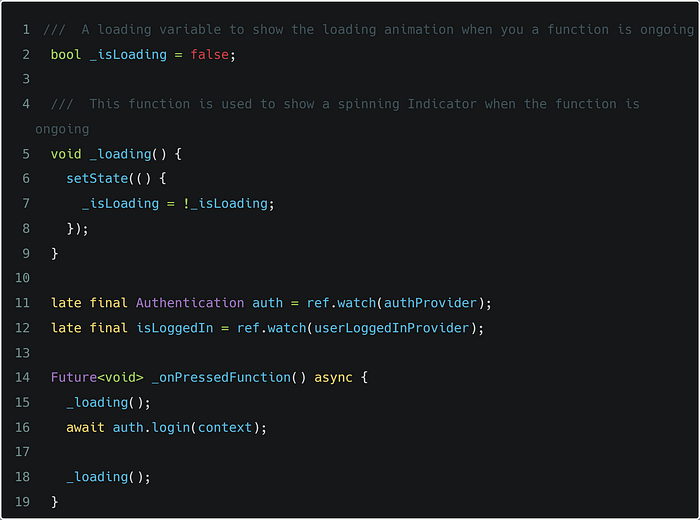
And in the onPressed function of the Play Button, let’s add this for now:
widget.gameRef.overlays.remove(MainMenu.routename);That completes our work for the time being on main_menu screen for now. Let’s talk more about Flame now
How do you add a component inside a widget?
In Flutter everything’s a widget as I mentioned in the blog above. How are you gonna run a Flame engine on top of it which needs components?
This is where GameWidget comes to the rescue. Let’s look at the code of main.dart .

To add a Game Component inside a widget, we need GameWidget<T> and thus you pass your object in the parameter. This is only required once cause we are mainly adding either FlameGame or Forge2DGame component and thus from there we manage adding or removing components.
You may have one more question here, Why not simply add MiniWars() in the parameter instead of creating a variable and then passing it?
This is because when you hot reload every time, a new object instance is always created so it kinda works like hot restart. So it’s kinda annoying when your game just relaunches again and again for some really small changes. So we have added this just for debugging purposes and would remove it in production. So it’s better to add a TODO here to not forget yourself.
Let’s create mini_wars.dart file. We will be creating a single Forge2DGame instance that manages everything for our game to run.
So Forge2DGame and not FlameGame?
Forge2D is basically a ported version of the Box2D physics engine (written in C++). Some of the features like a rigid body, gravity, continuous collision, etc come out of the box with this package. We could use FlameGame but that means writing more boilerplate. Also, I will be just experimenting here for now, and let’s see what fits better.
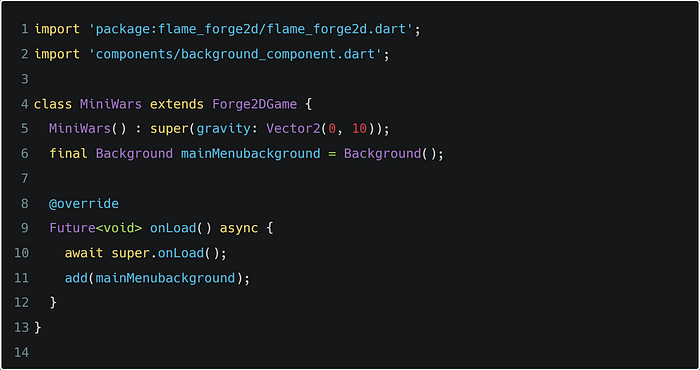
This is the initial mini_wars.dart file. You see that I have extended the Forge2DGame .
Now Forge2DGame has some functions which can be overridden. I would recommend just going through the source code and reading the comments for a better understanding. Seems overwhelming at first but then you would get the hang of it. Let’s talk about those methods which I would be overriding for the time being now.
onLoad() Method. As the name suggests, before late initialization, this would load all things you need (like images, audio, make some HTTP calls to fetch something, etc). This method would be only called once in a lifetime. By default, it returns null.
Here I wanted to add a mainMenuBackground before everything gets initialized. Oh yes, When the game starts, our MiniWars object is called and an initial overlay MainMenu widget is displayed. For background, we add mainMenuBackground component and then we remove it after we click play.
Let’s Look at the background_component.dart file
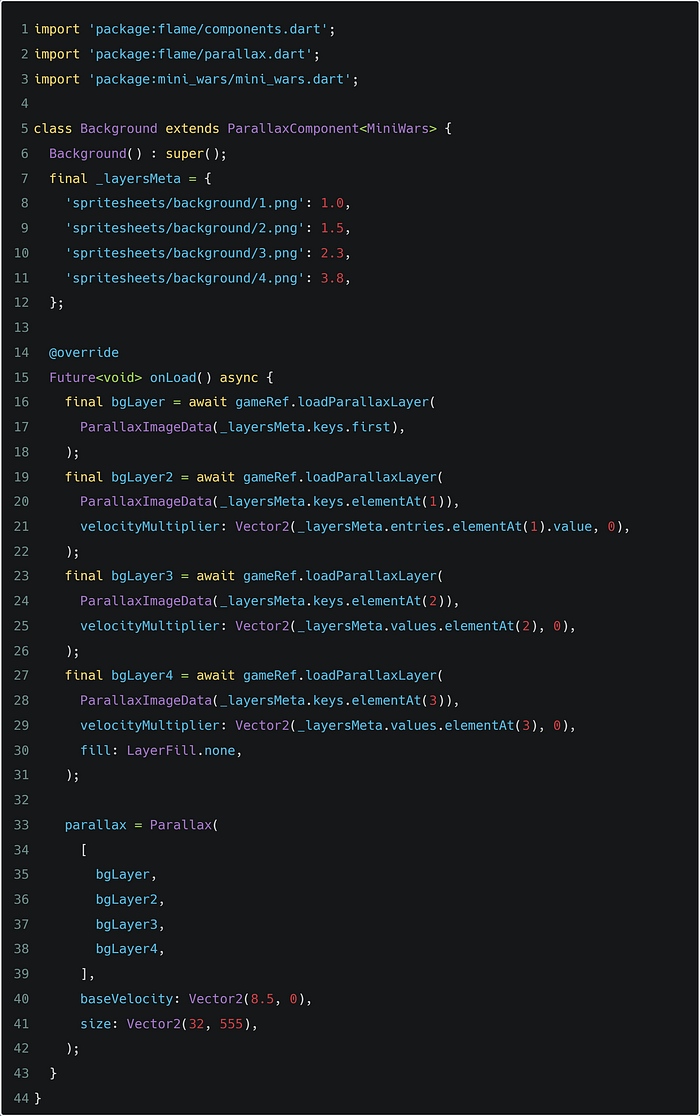
Flame Supports Parallax out of the box so you don’t need to hardcode it yourself😉. I had a parallax background image in 4 strips.

These 4 images combined to form a background and they need to be repeated. Thus Parallax.
So we created a map of paths with their velocity multipliers. The next thing we had to do is load all the parallax layers as done above.
Then ParallaxComponent has a Parallax object. We used the setter and added all the parallax layers with base velocity and size.
Read more about ParallaxComponent here
Let’s see how it looks so far
I will show you the outputs from 3 Platforms (Windows, Android, and web)
Well, I don’t know what to say but it looks
Now onto adding the player on the screen
I have also included the Player sprites in the repo itself. Just take a look at it. And these are all sprite sheets, i.e we will animate them. Now if you have used SFML in C++, you had to manually write some logic code for those animated sprite sheets but luckily Flame Engine does a SpriteAnimationComponent which can animate your sprites. Since we have a bunch of Spritesheet which include — jumping, crouching, idle, walking, running, etc; we need SpriteAnimationGroupComponent<T> . Thus, we will change the sheet on the component when the following action is performed. Say when jumping, we use jumping sprite sheet and so on.
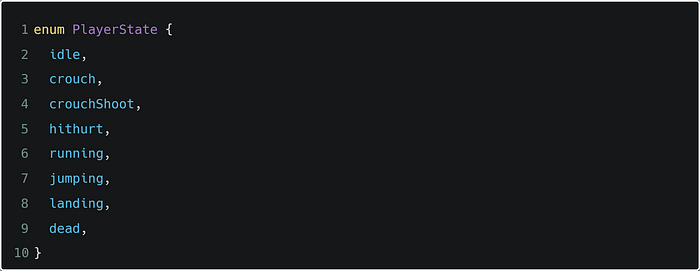
Let’s work on player_component.dart file. We will first work on animating the sprite first then we will add some movement. Let’s define an enum PlayerState .
Let’s create our Player class . Just read this doc and you will understand better of how SpriteGroupComponent works.
Look at the source code carefully. Each SpriteAnimation variable denotes the sprite sheet animation to shift. It has a variable current which shows the current state to show. I have set to idle. We also added a mixin KeyboardHandler to change the animations by pressing keys.
The next thing to do is load all the sprite sheets. I created a separate function and called in onLoad() function. Then I linked it with the correct key values. Then all was left to complete onKeyEvent .
Let’s check it out now.
Don’t forget to create a variable in MiniWars and add it using the Play button onTap function.

and in mini_wars.dart file
final Player hero = Player();Live Time

I will end this blog here. In the next part, I will talk about involving the physics of the player, gesture input for mobile devices, and maybe add some more sprites or something?
If you want to reach me, you can by the following handles: